> ## Documentation Index
> Fetch the complete documentation index at: https://paylink-c15dc1ba.mintlify.site/llms.txt
> Use this file to discover all available pages before exploring further.
# Build Agent
> Integrate PayLink payment tools into your AI agent
Now that you've tested your payment provider connection, you're ready to integrate PayLink into your AI agent. This guide shows you how to build an agent using LangChain that can process payments for orders.
## Install LangChain
Make sure you have LangChain installed:
```bash pip theme={null}
pip install langchain
```
```bash uv theme={null}
uv add langchain
```
## Create Your Agent
Create a `.env` file with the following environment variables:
```bash theme={null}
# OpenAI Configuration
OPENAI_API_KEY="your_openai_api_key"
# LangSmith Tracing
LANGSMITH_API_KEY="your_langsmith_api_key"
LANGCHAIN_TRACING_V2=true
LANGCHAIN_PROJECT='payment-with-human-approval'
# PayLink Configuration
PAYLINK_API_KEY="your_paylink_api_key"
PAYLINK_PROJECT="your_paylink_project_name"
PAYLINK_TRACING="enabled"
# Payment Provider
PAYMENT_PROVIDER=["mpesa"]
# M-Pesa Configuration
MPESA_BASE_URL="https://sandbox.safaricom.co.ke"
MPESA_CONSUMER_SECRET="your_mpesa_consumer_secret"
MPESA_CONSUMER_KEY="your_mpesa_consumer_key"
MPESA_PASSKEY="your_mpesa_passkey"
MPESA_BUSINESS_SHORTCODE="your_business_shortcode"
MPESA_CALLBACK_URL="https://yourdomain.com/mpesa-express-simulate/"
```
Replace the placeholder values with your actual API keys and credentials.
First, create a tool to retrieve orders from your database. This example uses a simple in-memory database:
```python theme={null}
from langchain.tools import tool
from typing import Literal
TOOL_DESCRIPTION = """
This tool returns orders from the database
Args:
- payment_status: The payment status of the orders. Can be "paid", "pending", or "failed". If not provided, all orders are returned.
Returns:
- A list of orders with the following fields:
- name: The name of the order
- price: The price of the order
- quantity: The quantity of the order
- payment_status: The payment status of the order
"""
@tool("get_orders", description=TOOL_DESCRIPTION)
def get_orders(
payment_status: Literal["paid", "pending", "failed"] | None = None,
) -> list[dict]:
"""Return orders in the cart, optionally filtered by payment status."""
orders = [
{
"name": "Item 1",
"price": 100,
"currency": "Ksh",
"quantity": 1,
"payment_status": "paid",
},
{
"name": "Item 2",
"price": 200,
"currency": "Ksh",
"quantity": 2,
"payment_status": "pending",
},
]
if payment_status is None:
return orders
normalized_status = payment_status.lower()
return [
item for item in orders if item["payment_status"].lower() == normalized_status
]
```
Set up PayLink tools and create your agent:
```python theme={null}
from langchain.agents import create_agent
from langchain.chat_models import init_chat_model
from paylink.integrations.langchain_tools import PayLinkTools
from src.tools.get_orders import get_orders
paylink_client = PayLinkTools()
payment_tools = paylink_client.list_tools()
tools = [get_orders] + payment_tools
agent = create_agent(
model=init_chat_model(model="gpt-4o-mini"),
tools=tools,
)
```
Start the LangGraph development server:
```bash theme={null}
langgraph dev
```
This will start the agent and make it available at `http://localhost:2024`.
Once the server is running, you can interact with your agent through the LangGraph Studio interface or via API calls.
Here's an example of how a conversation with your agent might flow:
1. Agent: "I can help you with orders and payments. What would you like to do?"
2. User: "Show me pending orders"
3. Agent: *Uses `get_orders` tool with `payment_status="pending"`*
4. Agent: "I found 2 pending orders. Would you like me to process payment for any of them?"
5. User: "Yes, process payment for Item 2"
6. Agent: *Prepares payment request and pauses for approval*
7. System: "Approval Required: Review the payment request for Item 2 (400 Ksh)"
8. User: *Reviews and approves*
9. Agent: *Executes payment via PayLink*
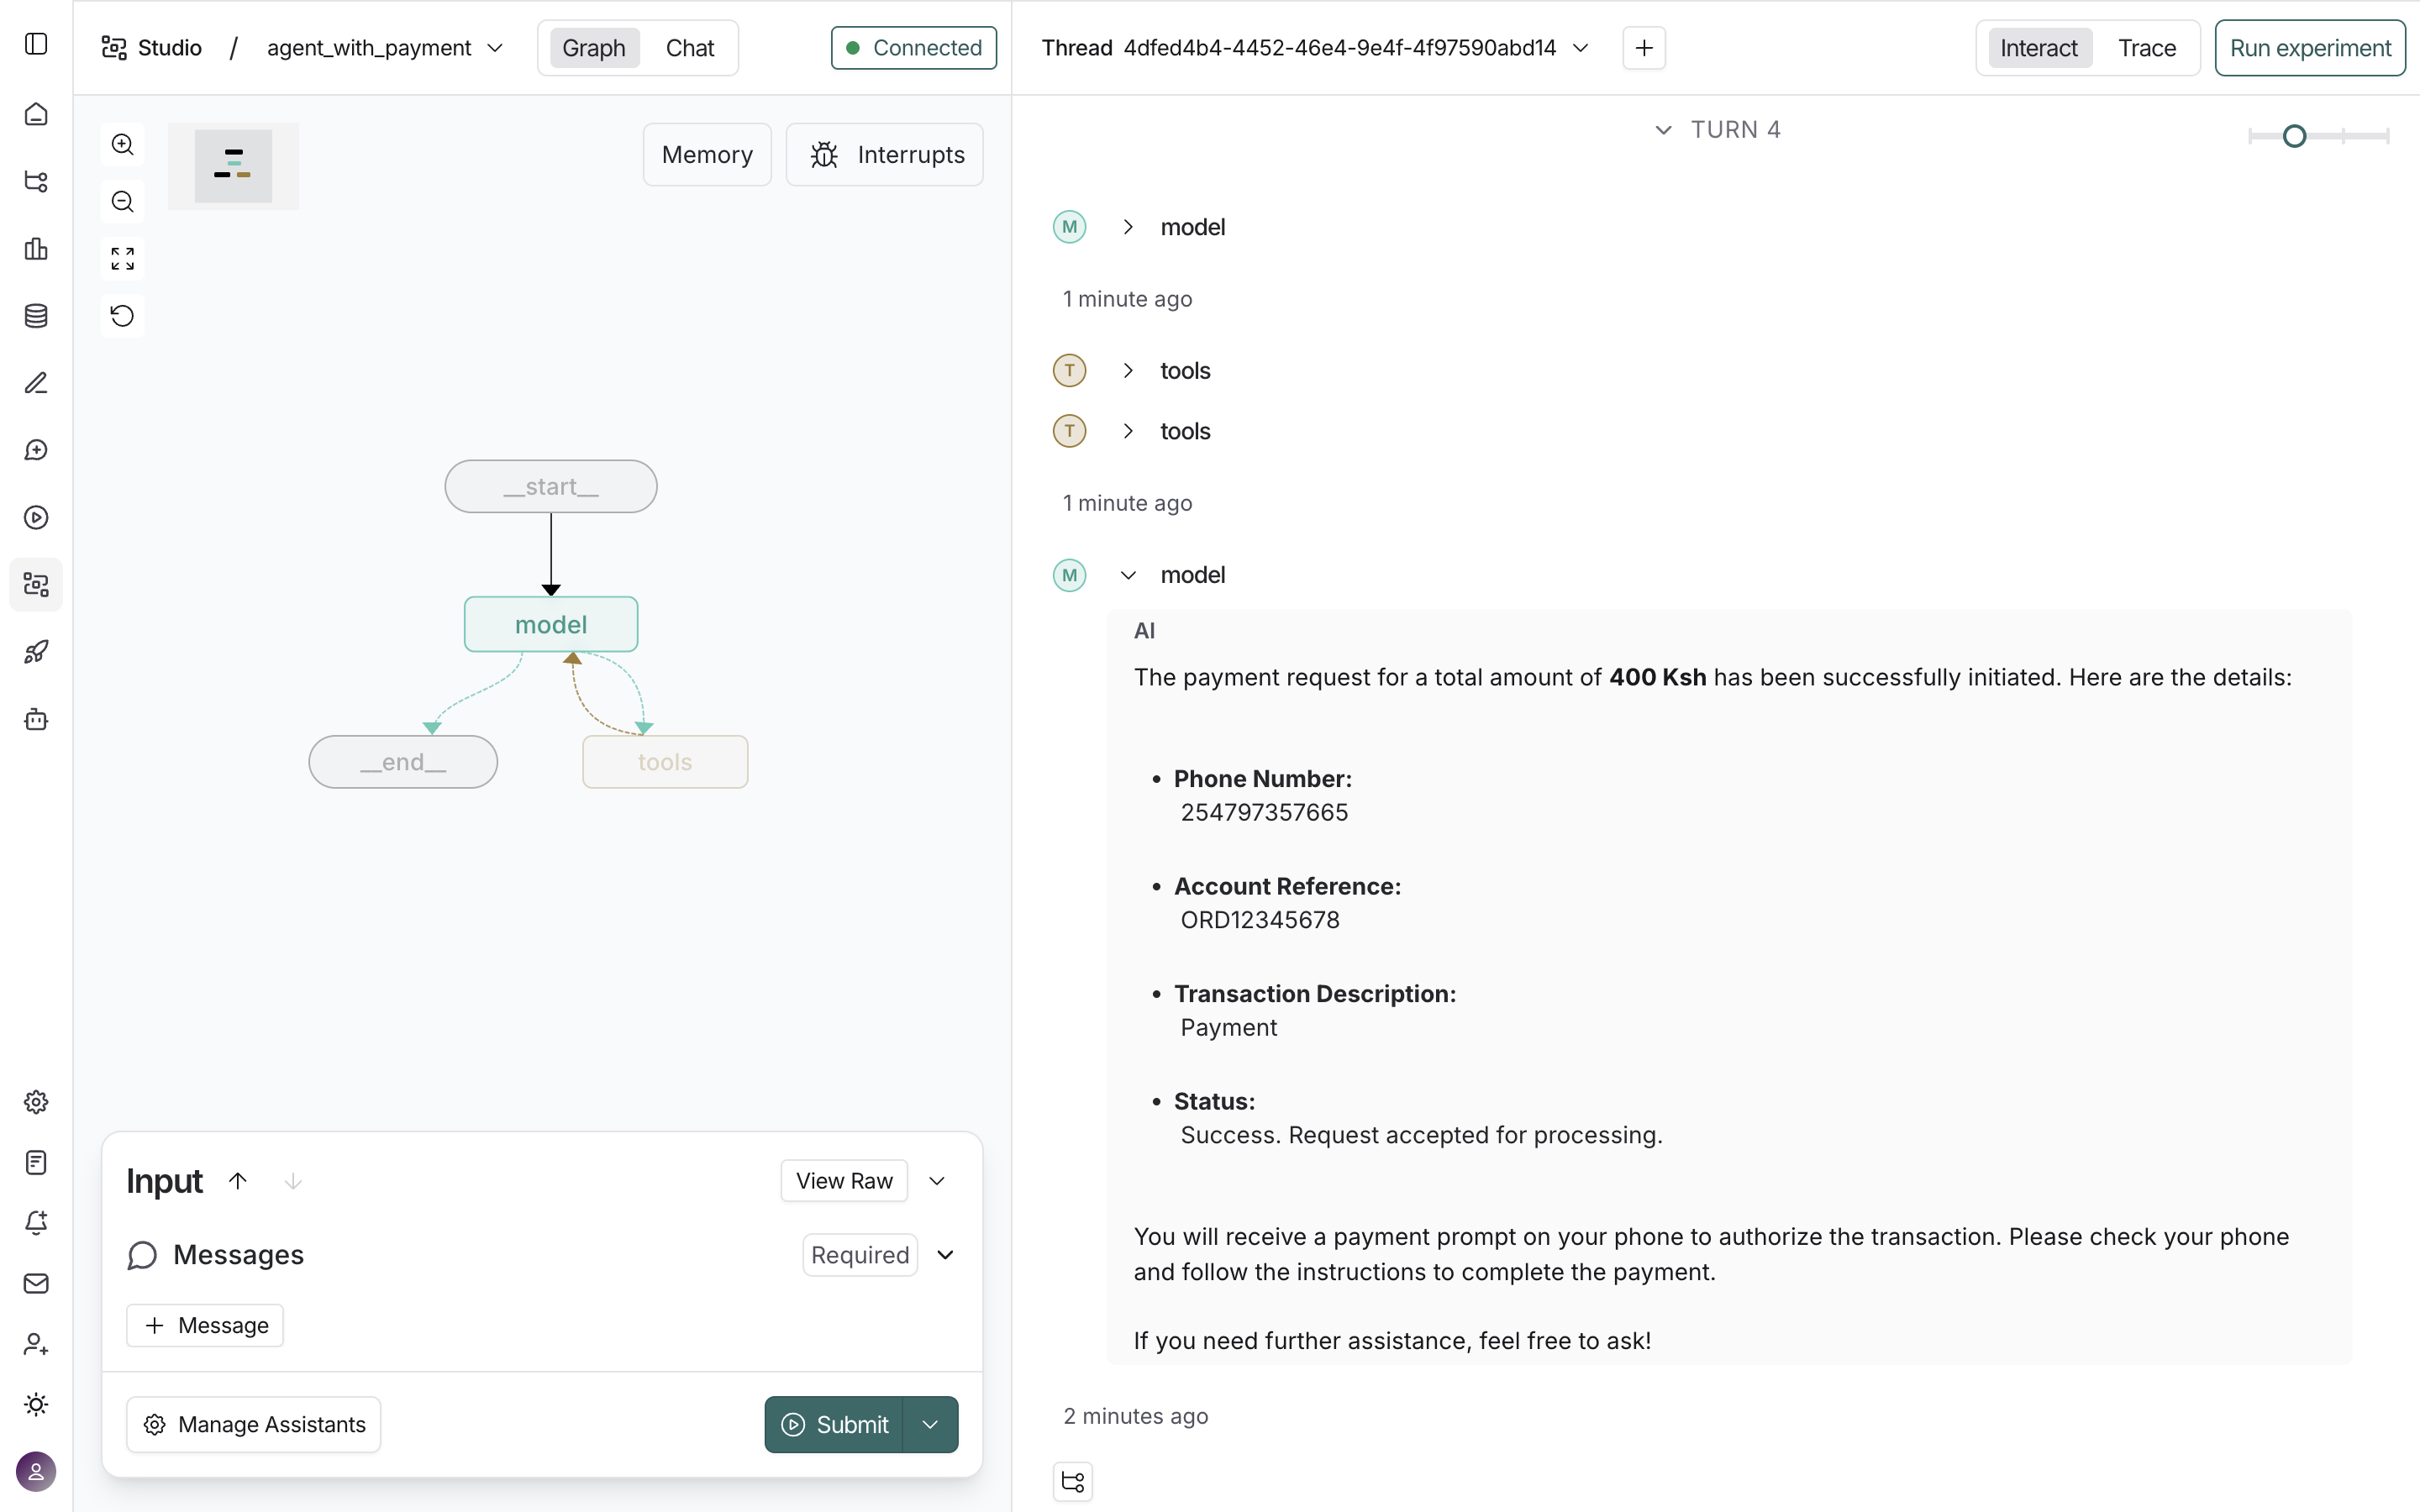 ## View Execution Traces
You can view detailed execution traces of your agent's interactions in LangSmith. This allows you to inspect tool calls, model responses, and the complete execution flow.
This is an example trace:
[View example trace →](https://smith.langchain.com/public/057e7fd6-80f9-4846-97e7-b044fc59d378/r)
## How It Works
The agent is configured with:
* **Payment Tools**: PayLink tools (like `stk_push`) are automatically available to the agent
* **Order Management**: The `get_orders` tool allows the agent to retrieve orders that need payment
When a user asks the agent to pay for pending orders, the agent will:
1. Retrieve pending orders using `get_orders`
2. Calculate the total amount
3. Initiate payment using the `stk_push` tool
4. The user receives a payment prompt on their phone to complete the transaction
## Full Code Example
For a complete, working example of an agent with PayLink payment integration, see the [agent-with-payment](https://github.com/paylinkmcp/agent-with-payment.git) repository on GitHub.
## Next Steps
Once your agent can handle payments, learn how to implement [Human in the Loop](/agent-to-human/human-in-the-loop) workflows for payment approvals.
## View Execution Traces
You can view detailed execution traces of your agent's interactions in LangSmith. This allows you to inspect tool calls, model responses, and the complete execution flow.
This is an example trace:
[View example trace →](https://smith.langchain.com/public/057e7fd6-80f9-4846-97e7-b044fc59d378/r)
## How It Works
The agent is configured with:
* **Payment Tools**: PayLink tools (like `stk_push`) are automatically available to the agent
* **Order Management**: The `get_orders` tool allows the agent to retrieve orders that need payment
When a user asks the agent to pay for pending orders, the agent will:
1. Retrieve pending orders using `get_orders`
2. Calculate the total amount
3. Initiate payment using the `stk_push` tool
4. The user receives a payment prompt on their phone to complete the transaction
## Full Code Example
For a complete, working example of an agent with PayLink payment integration, see the [agent-with-payment](https://github.com/paylinkmcp/agent-with-payment.git) repository on GitHub.
## Next Steps
Once your agent can handle payments, learn how to implement [Human in the Loop](/agent-to-human/human-in-the-loop) workflows for payment approvals.