Before you begin, make sure you’ve completed the Prerequisites to set up your environment and PayLink account. If you haven’t built a basic MCP server yet, start with the unmonetized version.
Overview
When you monetize an MCP server, you configure it to:- Execute the tool and return results
- Evaluate the result quality (if evaluation is enabled)
- Process payment based on evaluation outcome or automatically
- Return both the tool result and payment confirmation
Adding Payment with PayLink
Let’s add PayLink monetization to your existing MCP server. We’ll build on top of the unmonetized MCP server structure.1
Add PayLink imports
Add the PayLink monetization imports to your existing imports section:These imports provide:
require_payment: Decorator that handles payment verification before tool executionset_agent_wallet_from_scopeandreset_agent_wallet: Functions to manage wallet context from request scope
2
Add payment requirement to tool handler
Add the The
@require_payment decorator to your call_tool function. The decorator takes a dictionary mapping tool names to their pricing configuration:@require_payment decorator automatically:- Extracts the agent’s wallet connection string from request headers
- Executes the tool and collects the result
- Evaluates the result quality when
require_evaluationis enabled - Processes payment based on the evaluation result (if enabled) or automatically (if disabled)
3
Add wallet context handling
Update your ASGI handler to extract and manage wallet context from the request:The
set_agent_wallet_from_scope function reads the agent’s wallet connection string from request headers (typically wallet-connection-string) and makes it available to the @require_payment decorator. The context is cleaned up in the finally block to prevent memory leaks.4
Run the server
Save your code to a file (e.g., You can also specify custom options:When the server starts successfully, you’ll see output like:Your monetized MCP server is now running and ready to accept tool calls with payment at
main.py) and run it:http://0.0.0.0:5003/mcp.Complete Example
Here’s the complete example of a monetized MCP server:Connecting an Agent to Your Monetized MCP Server
Now that your monetized MCP server is running, you can connect an agent to use its tools. The agent code is the same as connecting to an unmonetized server, but you need to ensure the agent has access to its wallet connection string.1
Configure agent environment
In your agent project, ensure your This wallet connection string is used by PayLinkTools to automatically handle payments when calling monetized tools. The agent’s wallet will be debited when tools are executed.
.env file includes the wallet connection string from your AGENT project:2
Create the agent
Use PayLink’s LangChain integration to connect to your monetized MCP server:The
PayLinkTools class automatically:- Connects to your MCP server at the specified URL
- Discovers available monetized tools
- Handles payment processing using the wallet connection string from your
.envfile - Makes tools available to your LangChain agent
3
Use the agent
You can now use the agent to interact with your monetized MCP server tools:The agent will automatically:
- Use the
addtool from your MCP server - Handle payment processing (payment is processed after tool execution, and only if evaluation passes when enabled)
- Return the result to the agent
Complete Agent Example
Here’s a complete example of a LangChain agent using your monetized MCP server:Make sure your agent’s
.env file contains WALLET_CONNECTION_STRING="your_agent_connection_string" before running the agent. This is required for PayLinkTools to handle payments when calling monetized tools.Full Working Example
For a complete, working example of a monetized MCP server and agent, see the how_to_monetize_mcp_server repository on GitHub.Viewing Wallet Transactions
After your agent calls monetized tools, you can view the payment transactions in both wallets:MCP Wallet (Receiving Payments)
Navigate to your MCP project’s wallet in the PayLink dashboard to see incoming payments from agents: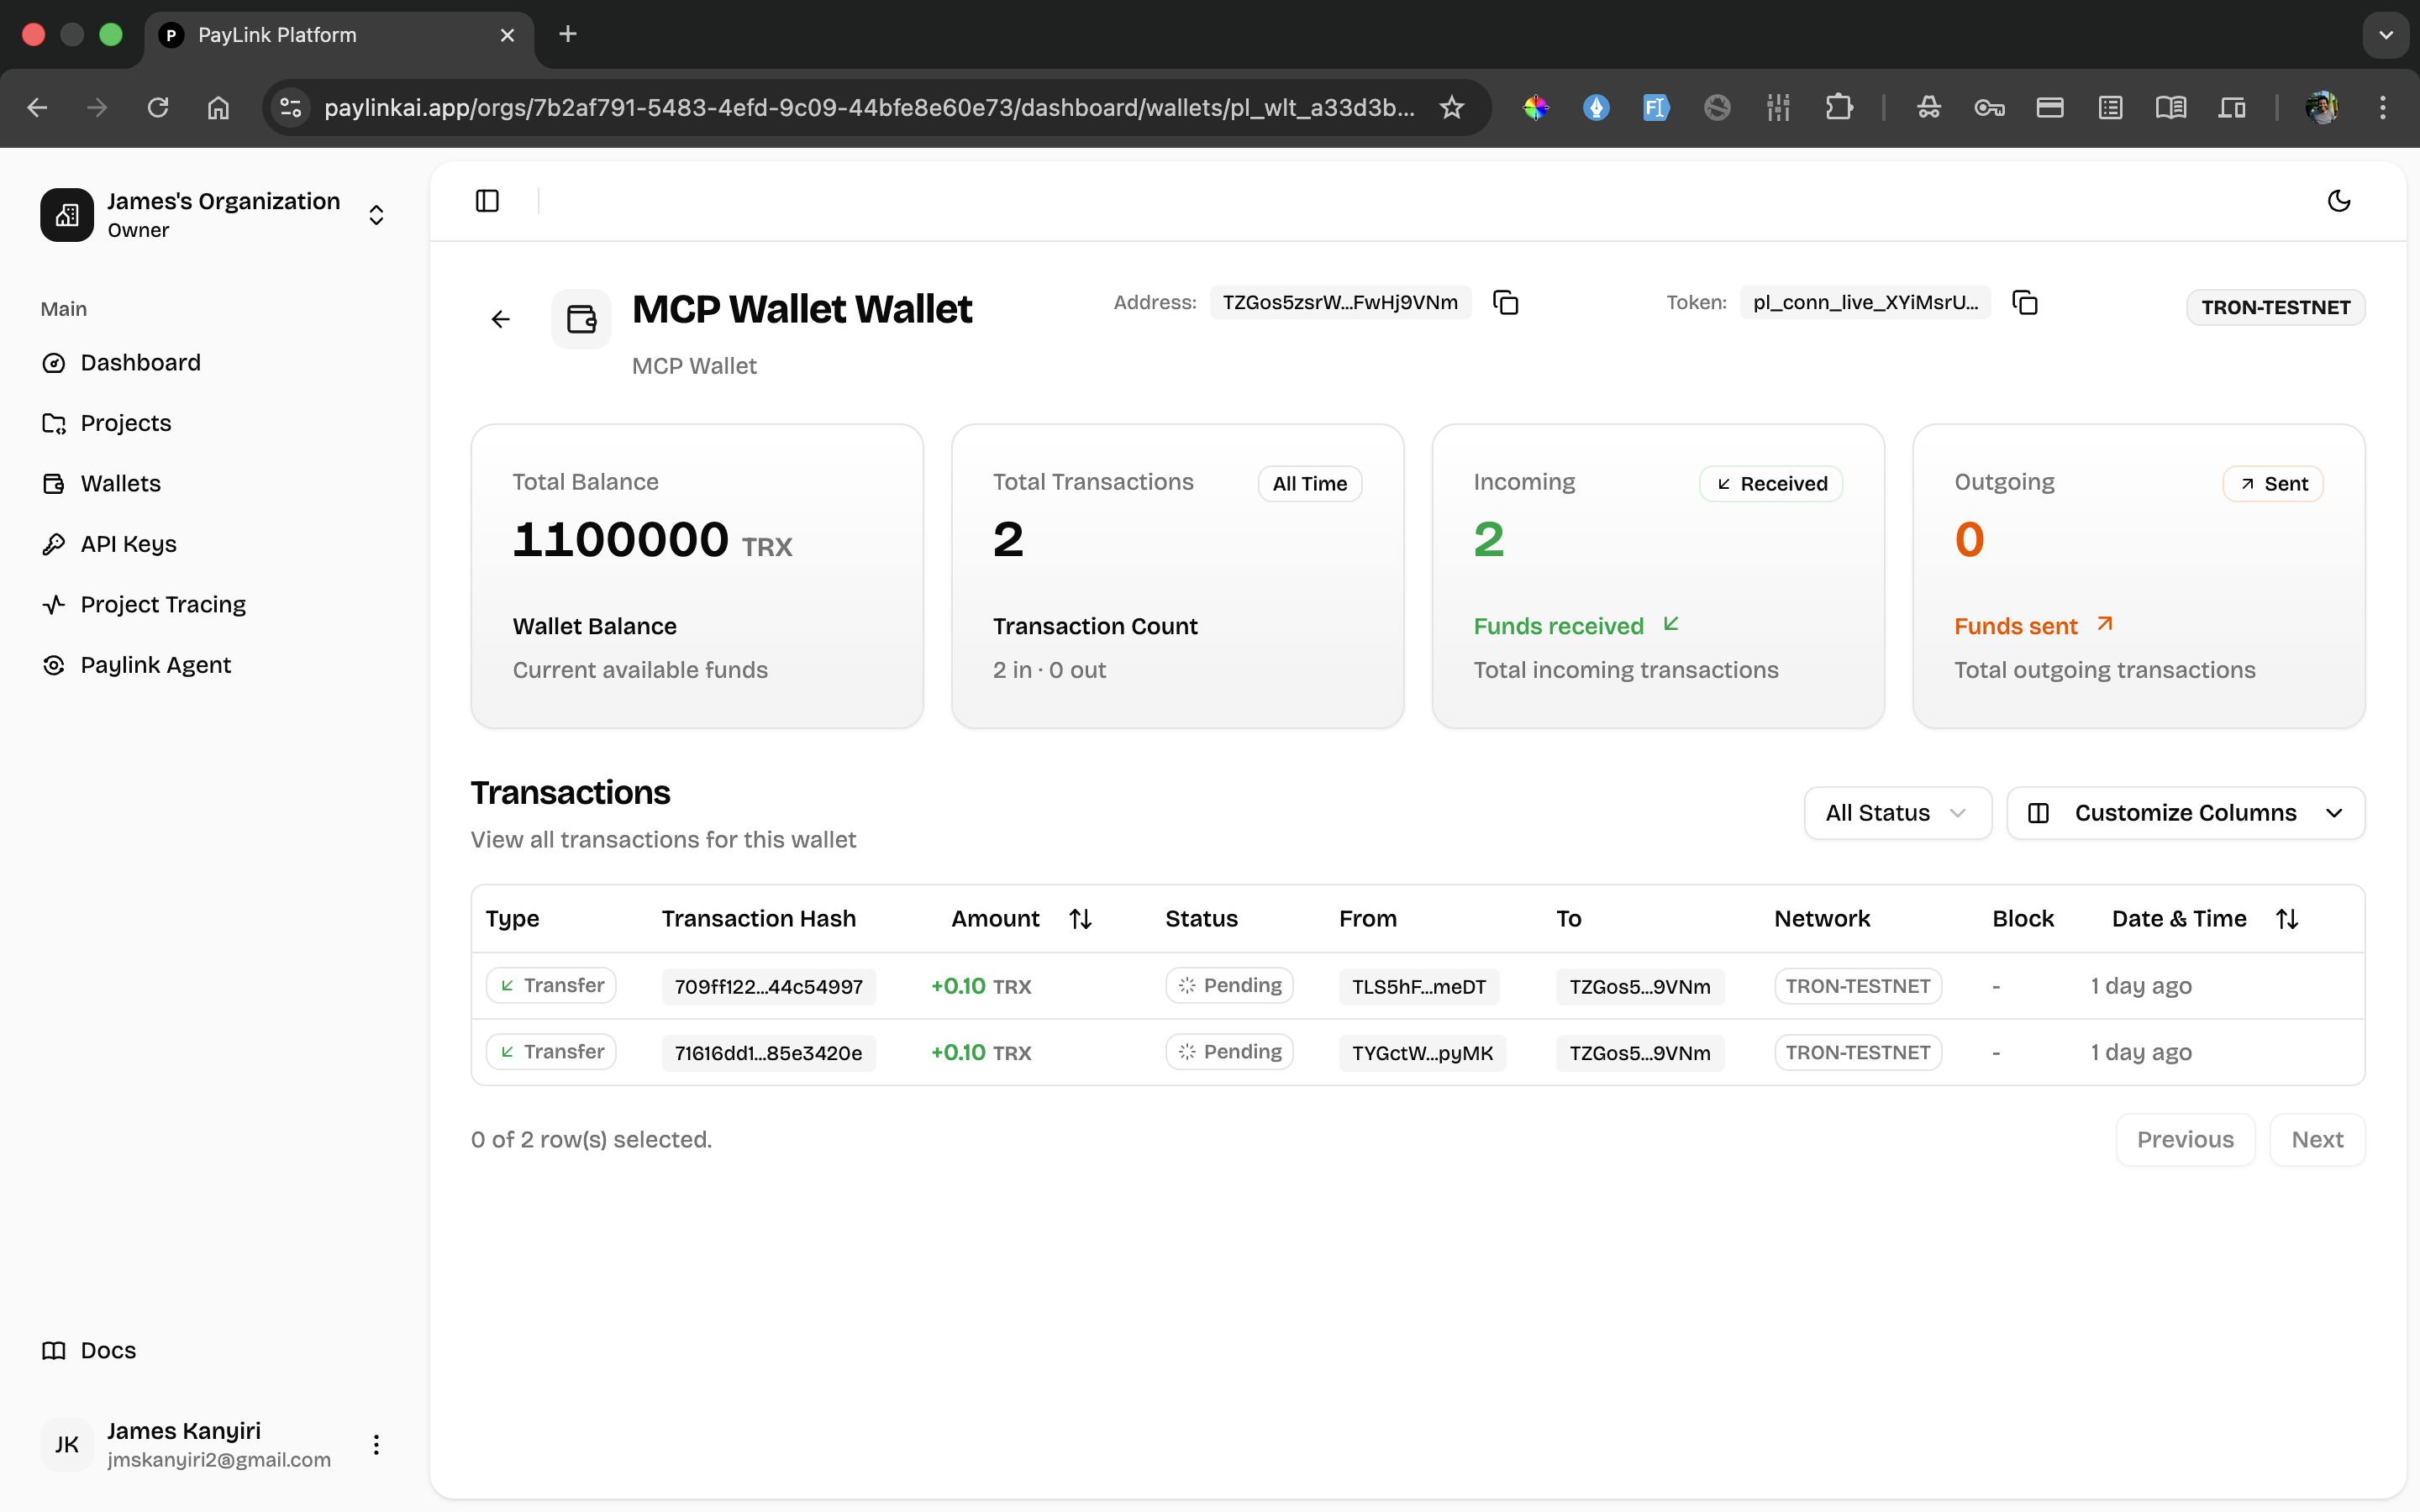
- Total Balance: Accumulated payments from all agent transactions
- Incoming Transactions: Each payment received when agents call your monetized tools
- Transaction Details: Amount, status, and source wallet for each payment
Agent Wallet (Sending Payments)
Navigate to your agent project’s wallet in the PayLink dashboard to see outgoing payments to MCP servers: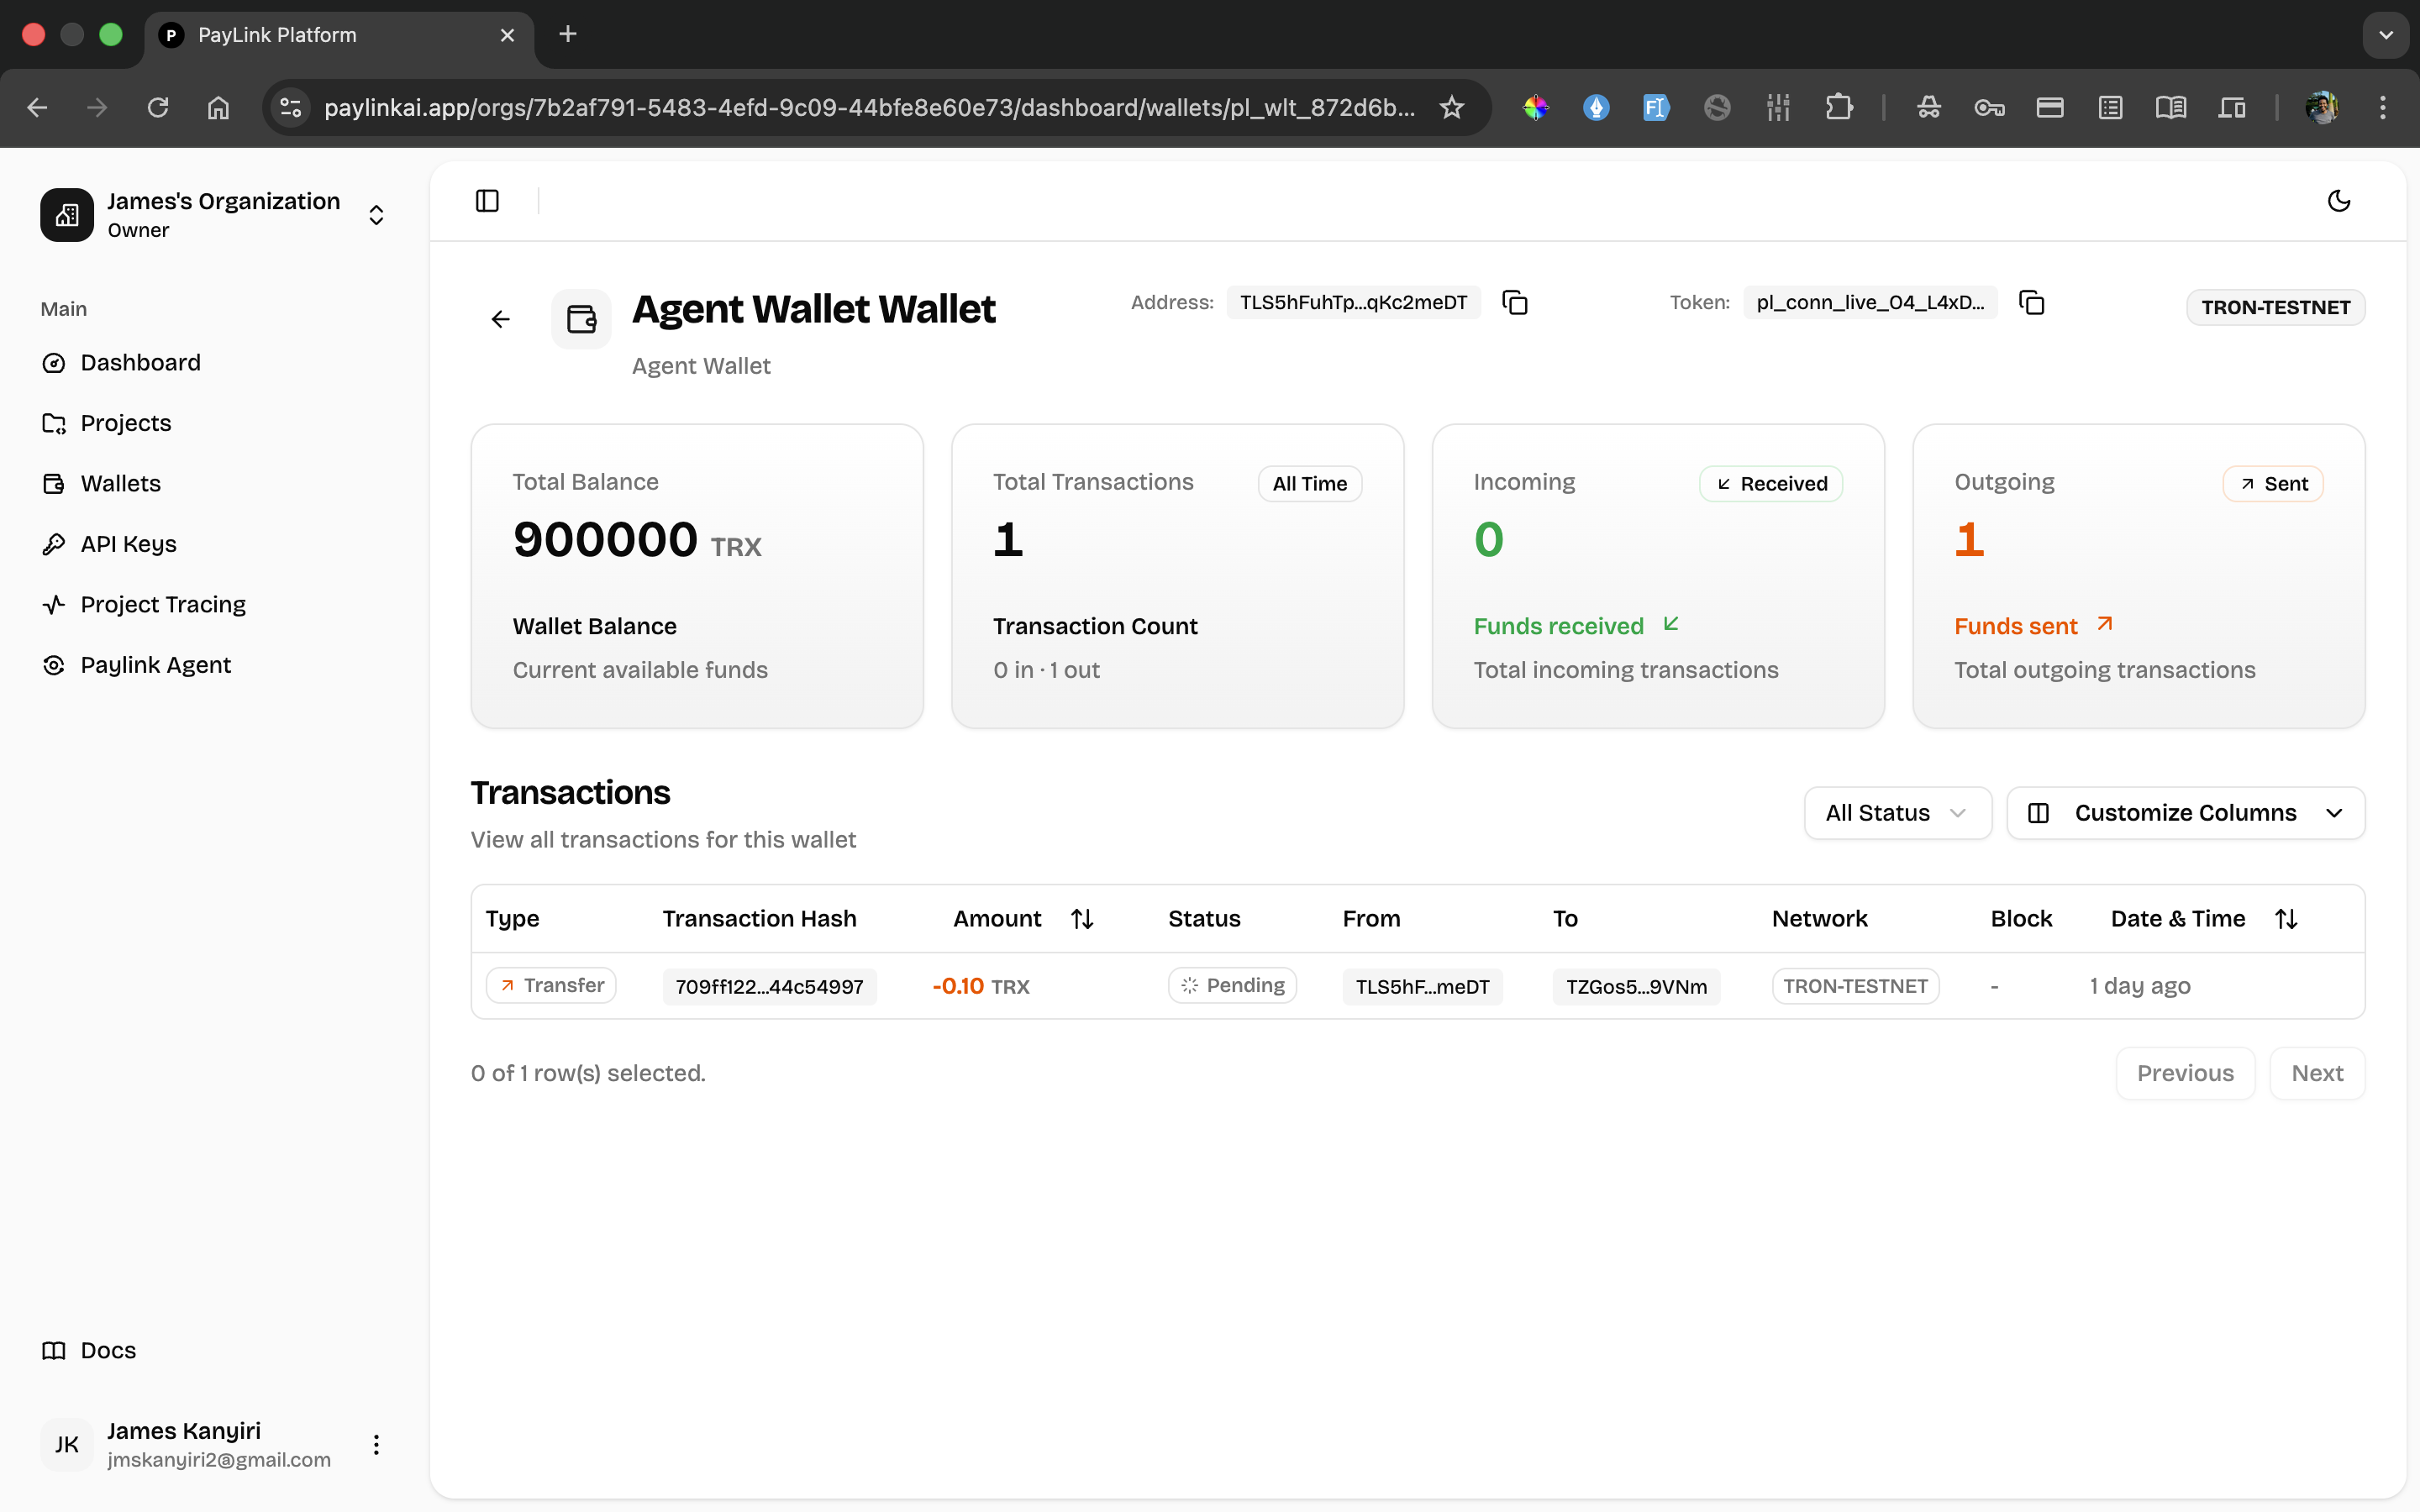
- Total Balance: Remaining funds available for tool calls
- Outgoing Transactions: Each payment made when calling monetized tools
- Transaction Details: Amount, status, and destination wallet for each payment
What you achieved
- You configured your MCP server to require payment before tool execution
- You integrated PayLink wallet verification into your tool handlers
- You connected an agent to your monetized MCP server
- Your agent can now call monetized tools and payments are handled automatically
- Your tools now accept payments from agents using PayLink wallets
- You can track payments received in your PayLink dashboard
Next steps
Once your MCP server is monetized and your agent is connected, you can:- Monitor payments in your PayLink dashboard
- Adjust pricing and evaluation settings for your tools
- Scale your monetized MCP server to serve multiple agents