Install LangChain
Make sure you have LangChain installed:Create Your Agent
1
Configure environment variables
Create a Replace the placeholder values with your actual API keys and credentials.
.env file with the following environment variables:2
Create the orders tool
First, create a tool to retrieve orders from your database. This example uses a simple in-memory database:
3
Initialize PayLink and create the agent
Set up PayLink tools and create your agent:
4
Running the Agent
Start the LangGraph development server:This will start the agent and make it available at
http://localhost:2024.5
Interacting with the Agent
Once the server is running, you can interact with your agent through the LangGraph Studio interface or via API calls.
6
Example conversation flow
Here’s an example of how a conversation with your agent might flow: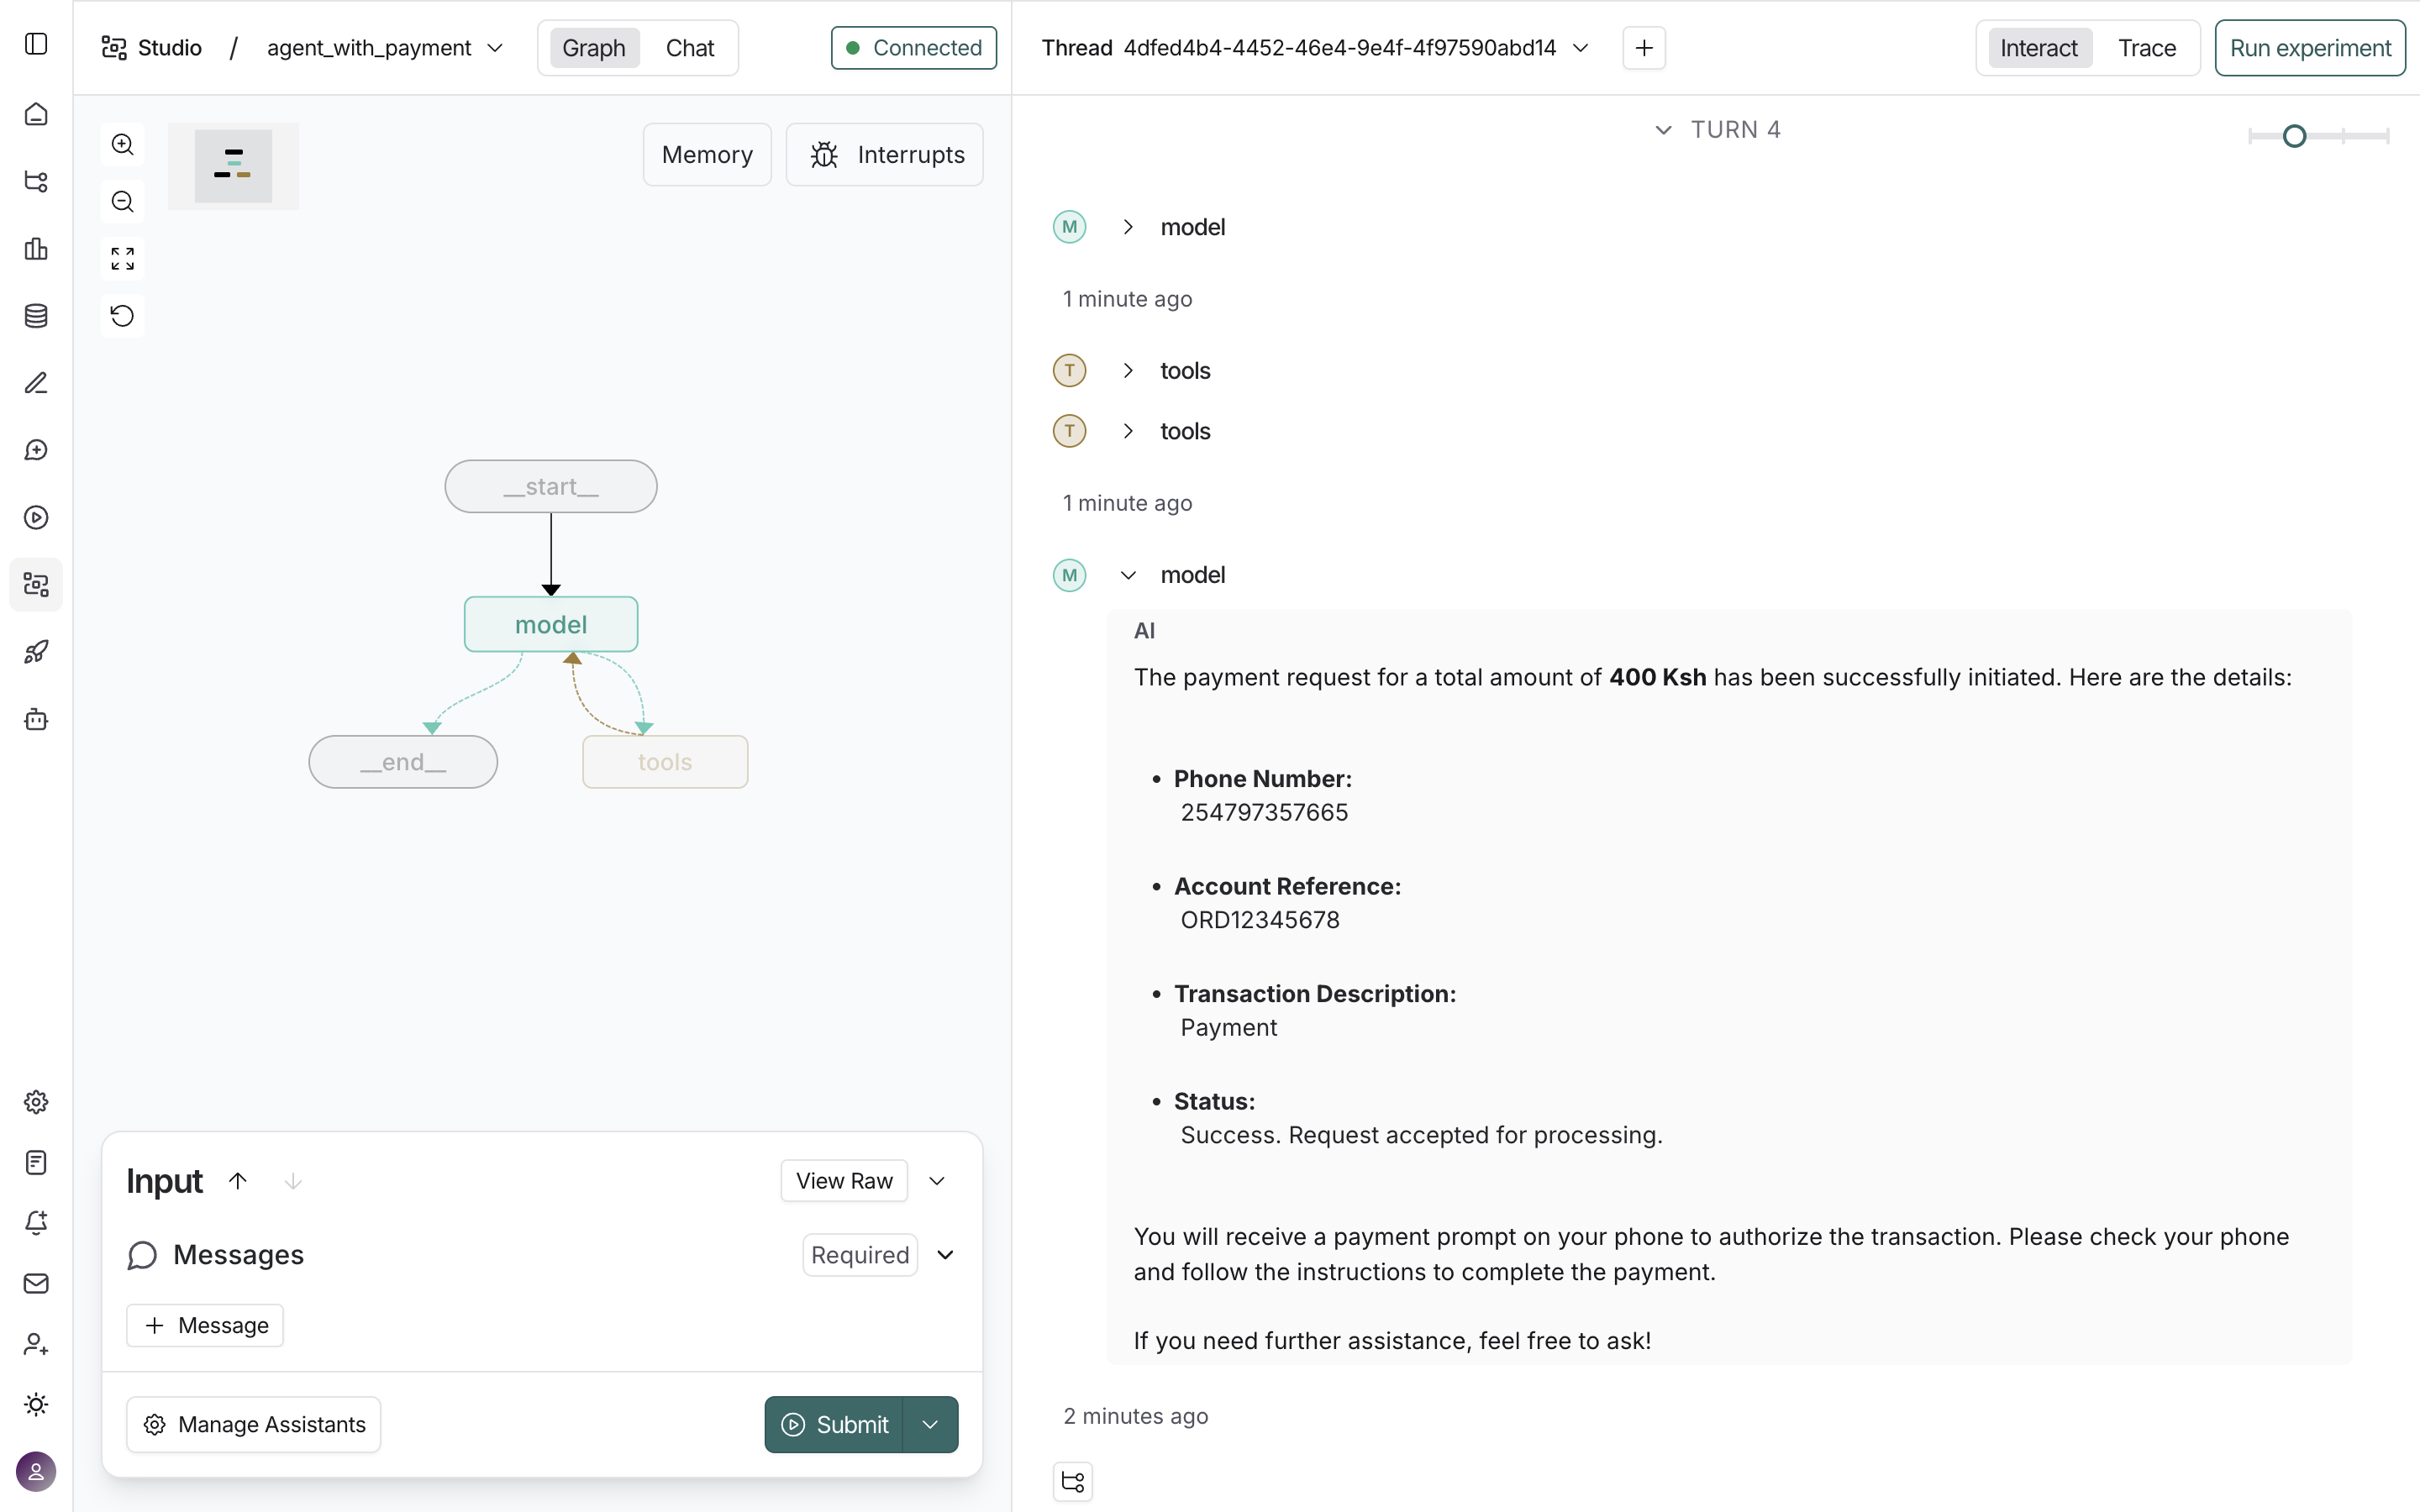
- Agent: “I can help you with orders and payments. What would you like to do?”
- User: “Show me pending orders”
-
Agent: Uses
get_orderstool withpayment_status="pending" - Agent: “I found 2 pending orders. Would you like me to process payment for any of them?”
- User: “Yes, process payment for Item 2”
- Agent: Prepares payment request and pauses for approval
- System: “Approval Required: Review the payment request for Item 2 (400 Ksh)”
- User: Reviews and approves
- Agent: Executes payment via PayLink
View Execution Traces
You can view detailed execution traces of your agent’s interactions in LangSmith. This allows you to inspect tool calls, model responses, and the complete execution flow. This is an example trace: View example trace →How It Works
The agent is configured with:- Payment Tools: PayLink tools (like
stk_push) are automatically available to the agent - Order Management: The
get_orderstool allows the agent to retrieve orders that need payment
- Retrieve pending orders using
get_orders - Calculate the total amount
- Initiate payment using the
stk_pushtool - The user receives a payment prompt on their phone to complete the transaction